ationaxprioni
Deploying Like Pieter Levels: A Fast and Efficient CI/CD Pipeline for Developers
Sep 09, 2024
Table of Contents
Introduction
Who is Pieter Levels?
I first came across Pieter Levels on hacker news where he discussed building multiple startups and emphasized rapid iteration.
🍰 Only 4 out of 70+ projects I ever did made money and grew
— @levelsio (@levelsio) November 7, 2021
📉 >95% of everything I ever did failed
📈 My hit rate is only about ~5%
🚀 So...ship more pic.twitter.com/oAn2rdRpFT
Like most posts on hacker news, it quickly fell out of my radar. Fast forward to a few days ago, Lex Friedman interviewed him on his podcast.
Pieter Levels is a nomad entrepreneur that focuses on building small projects quickly and monetizing them. This lifestyle has made him a multi-millionaire and very popular online.
Towards the end of the podcast the topic of deploying fast came up and Levels teased how he deploys so quickly. So in this article I will give complete guide on how to deploy like Pieter Levels.
TL;DR
To deploy like Pieter Levels, create a webhook route on the server, register that webhook to Github to listen to push events and whenever a push event happens the webhook clones the repository and executes the build-run steps.
There are several problems with this approach like maintaining the webhook code and not being able to scale easily.
In this post, I’ll walk you through the process of setting up a CI/CD pipeline inspired by Pieter Levels’ workflow. We’ll cover everything from server setup, writing webhooks, and automating deployment.
Guide
In this guide we’re going to setup a CI/CD pipeline that deploys a simple MERN stack application on a server like Pieter Levels.
Setup
In order to follow along with that application you will need to fork this repository: https://github.com/prince-ao/the-most-complicated-button.
You can also use a project of yours that you want to deploy, but I would highly recommend against that.
VS Code is recommended for the keybinding configuration part of the guide.
Brief Introduction to Github Webhooks
Github Webhooks is a service that that sends a POST request to any URL specified whenever a specific action is taken; in our case a push to the repository.
This is essentially the glue of the CI/CD pipeline.
Launching and Configuring the Server
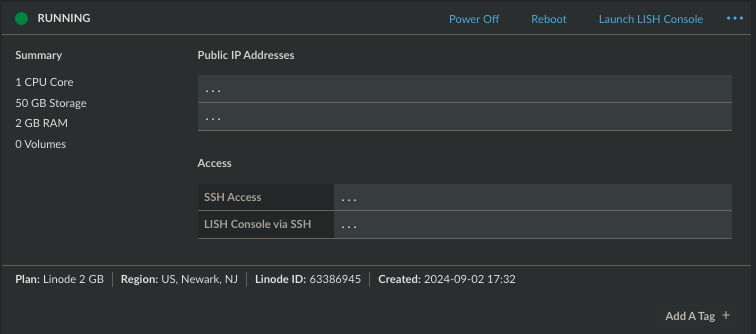
Like Pieter Levels, I will be using a linode cloud server.
To start, sign up for Linode, then create a new ‘Linode’ instance by following the platform’s step-by-step instructions.
I’m using a very simple spec for the ubuntu shared instance:
If it’s a new instance make sure to run
sudo apt update
suo apt upgrade
On the server you will need node and mongodb for the MERN application
curl -o- https://raw.githubusercontent.com/nvm-sh/nvm/v0.40.0/install.sh | bash
nvm install 22
To install mongodb on the server, follow this simple tutorial: install mongodb community edition on ubuntu
Finally you will need python for writing the webhook route. Why python? Because it’s simple. Python should be installed by default on ubuntu, you can test it by running
python3 -v
Writing a Webhook
A webhook is simply a POST request.
We will be using the flask backend framework
mkdir webhook && cd webhook

# creating virtual environment
python3 -m venv .venv
source .venv/bin/activate

# installing flask
pip3 install flask
After installing flask create a new file called webhook.py and paste this code into it.
from flask import Flask, request, jsonify

app = Flask(__name__)

@app.route('/webhook', methods=['POST'])
def webhook():
   payload = request.json

   print("payload:", payload)

   return jsonify({"message": "webhook received"}), 200

if __name__ == "__main__":
   app.run(host="0.0.0.0", port=5000)
Run the webhook in the background and set the log and error outputs to a separate file.
nohup python webhook.py > webhook.log 2> webhook.error &
Adding the webhook to github
Now it’s time to tell github about our webhook.
Read the error file and you should find the global endpoint for your server that
cat webhook.error
- Running on all addresses (0.0.0.0)
- Running on http://127.0.0.1:5000
- Running on http://173.x.x.x:5000 <- this is the global endpoint
Paste the endpoint to github webhook interface under the repository settings for the project with a /webhook appended to it; the name of the route we created.
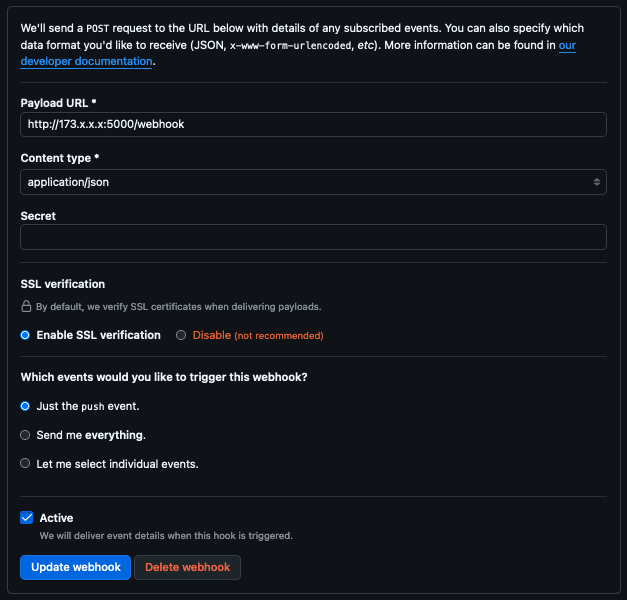
When you push a small change, you should find a payload that looks like this in webhook.log.
{
   "ref": "...",
   "before": "...",
   "after": "...",
   "repository": {...},
   .
   .
   .
}
Building the Application with the Webhook
The new webhook code will clone the repository if the push was to the main branch and builds and runs it
from flask import Flask, request, jsonify
import subprocess
import os
import shutil

app = Flask(__name__)

@app.route('/webhook', methods=['POST'])
def webhook():
   payload = request.json

   if payload["ref"].split("/")[-1] == "main":
      repo = "the-most-complicated-button"
      repo_url = f"https://github.com/prince-ao/{repo}.git" # replace with your repo url

      if os.path.exists(f"./{repo}"):
         # some clean up
         shutil.rmtree(f"./{repo}")
         subprocess.run(["fuser", "-k", "3000/tcp"])
         subprocess.run(["fuser", "-k", "8080/tcp"])

      try:
         subprocess.run(["git", "clone", repo_url], check=True)

         subprocess.run(["npm", "install", f"./{repo}/backend"], check=True)

         with open(f"./{repo}/backend/backend.log", "w") as log_file:
            subprocess.Popen(["npm", "run", "start"],
            cwd=f"./{repo}/backend", stdout=log_file, stderr=log_file)

         subprocess.run(["npm", "install", f"./{repo}/frontend"], check=True)

         subprocess.run(["npm", "run", "build"], cwd=f"./{repo}/frontend")

         with open(f"./{repo}/frontend/frontend.log", "w") as log_file:
            subprocess.Popen(["npm", "run", "start"],
            cwd=f"./{repo}/frontend", stdout=log_file, stderr=log_file)

      except Exception as e:
         print("unable to complete clone and deploy", e)


   return jsonify({"message": "webhook received"}), 200


if __name__ == "__main__":
   app.run(host="0.0.0.0", port=5000)
The pattern in the code above works for the majority of application, but each application will need to tailor the specific build and run commands to whatever framework or methods they use.
Kill the webhook process and run this new webhook
kill -9 [process id]

nohup python webhook.py > webhook.log 2> webhook.error &
To find the process id run:
ps -e -o pid,command | grep "python webhook.py"
And… we’re done! Just like that we have a working CI/CD pipeline similar to Pieter Levels’.
To see the website visit the web server endpoint: http://173.x.x.x:3000
Supercharge Your Workflow: One-Key Deployment
In the podcast with Lex Friedman, Levels also mentions that he deploy using CMD + Enter. We will be using vs code to implement that feature.
To do that you will need to create a new vs code task by creating a .vscode folder in the root of the folder and create the file tasks.json which contains
{
  "version": "2.0.0",
  "tasks": [
    {
      "label": "git add",
      "type": "shell",
      "command": "git add .",
      "group": {
        "kind": "build",
        "isDefault": true
      }
    },
    {
      "label": "git commit",
      "type": "shell",
      "command": "git commit -m 'quick change'",
      "group": {
        "kind": "build",
        "isDefault": true
      },
      "dependsOn": "git add"
    },
    {
      "label": "git push",
      "type": "shell",
      "command": "git push",
      "group": {
        "kind": "build",
        "isDefault": true
      },
      "problemMatcher": [],
      "dependsOn": "git commit"
    }
  ]
}
Finally go to your keybindings.json file by pressing Cmd + Shift + P and typing “Preferences: Open Keyboard Shortcuts (JSON)”.
Inside that file add this keybinding to the list of keybindings:
{
  "key": "cmd+enter",
  "command": "workbench.action.tasks.runTask",
  "args": "Git Push",
  "when": "editorTextFocus"
}
Make a change and push press Cmd + Enter and your change is deployed to production instantly.
Conclusion
Setting up a CI/CD pipeline line like Pieter Levels is a quick and effective way to get code deployed to production.
Although the CI/CD pipeline works, it has its drawbacks.
The most glaring problem is the maintenance of the webhook code; that’s a piece of code that’s hard to maintain because all the possible edge cases and it takes additional resources from the server.
Another problem with the CI/CD pipeline is that that it won’t work in every environment; if the server does not have, for example, node on it, the build and runs step will simply not run. Therefore if you want to scale horizontally, you will need to configure the new servers.
There’s is no testing in the pipeline, but that could be easily added after the build step in the webhook code.
While maintaining a custom webhook has its challenges, this setup is a powerful way to rapidly deploy projects like Pieter Levels.